Testimonials are very important to show proof to your customers and clients. Divi is very flexible and easy to use for its users and designers. But Divi is very lacking in deep customization of different things. Just like it, Testimonials are very important for a site but Divi provides very low customization for Testimonials.
In this article, we will customize the Divi Testimonial Module by Moving the Image to the Top from the Left side.
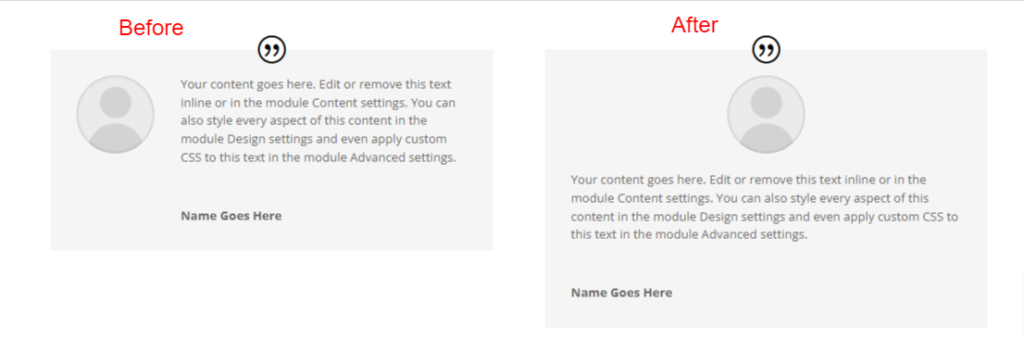
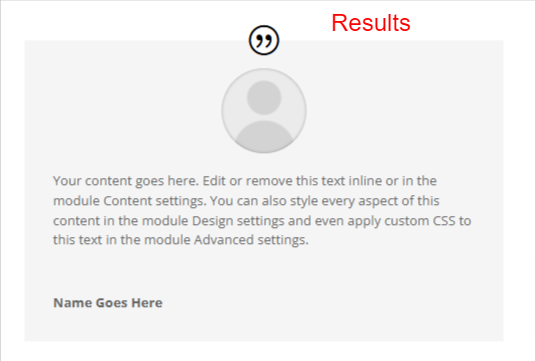
Results:
Default Settings:
By default, the Testimonial Image is on the Left but when the section or row is shrunk the image moves to the top. There is no way to move the image to the top in a wide section.
We can not move it to the right in a narrow section.
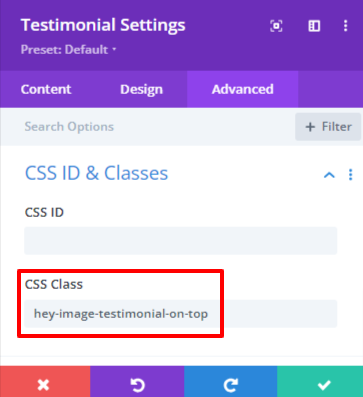
Adding Custom Class:
Go to Testimonials Settings > Advanced > CSS ID & Class and add this CSS Class:
hey-image-testimonial-on-top
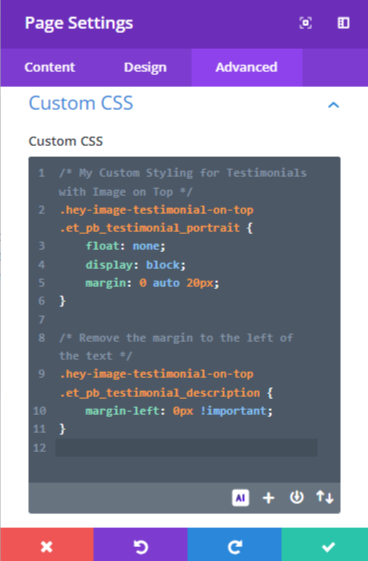
Adding the CSS Code:
Go to Page Settings > Advanced > Custom CSS and add this CSS Code:
/* My Custom Styling for Testimonials with Image on Top */
.hey-image-testimonial-on-top .et_pb_testimonial_portrait {
float: none;
display: block;
margin: 0 auto 20px;
}
/* Remove the margin to the left of the text */
.hey-image-testimonial-on-top .et_pb_testimonial_description {
margin-left: 0px !important;
}
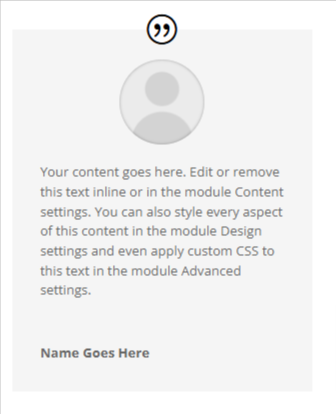
Results that you were looking for:
Conclusion:
This article shows How To Move The Divi Testimonial Module Image To The Top. This is a huge problem if you want to show the image on top without knowing how to code. You can simply do that by pasting the code copied from our site. All the images provided are useful for you.